
wooden shoe rack plans pdf
Discover numerous free DIY shoe rack plans online, offering detailed instructions, diagrams, and finishing tips for various styles and skill levels․
These plans empower you to build functional and stylish shoe storage solutions tailored to your specific needs and preferences․
Why Choose a Wooden Shoe Rack?
Opting for a wooden shoe rack presents a compelling blend of practicality and aesthetic appeal․ Unlike plastic or metal alternatives, wood offers a warmth and natural beauty that complements various home décor styles․
Wooden racks are remarkably durable, capable of withstanding daily use and the weight of numerous shoes for years to come․ Furthermore, wood is a sustainable material, especially when sourced responsibly, aligning with eco-conscious lifestyles․
DIY wooden shoe rack plans allow for complete customization – adjusting dimensions, finishes, and features to perfectly fit your space and organizational needs․ Building your own also provides a satisfying sense of accomplishment and a unique piece of furniture․
Ultimately, a wooden shoe rack is an investment in both functionality and style․
Benefits of DIY Shoe Rack Construction
Embarking on a DIY wooden shoe rack project unlocks a wealth of advantages beyond simply organizing footwear․ Cost savings are significant, as building your own typically proves far cheaper than purchasing a pre-made rack․
DIY construction allows for unparalleled customization; you can tailor the rack’s size, style, and features – like adding hooks or baskets – to perfectly match your specific requirements and available space․
The process itself is a rewarding experience, fostering creativity and enhancing woodworking skills․ Numerous free plans, readily available online in PDF format, cater to all skill levels, from beginner to experienced woodworkers․
Building your own ensures a unique, personalized piece, adding character to your home while decluttering your entryway or closet․

Types of Wooden Shoe Rack Plans
Explore diverse plans, including simple tiered racks, benches with storage, vertical designs maximizing space, and concealed cabinets for a tidy aesthetic․
PDF resources showcase industrial, floating, and column-style options, catering to varied tastes and organizational needs․
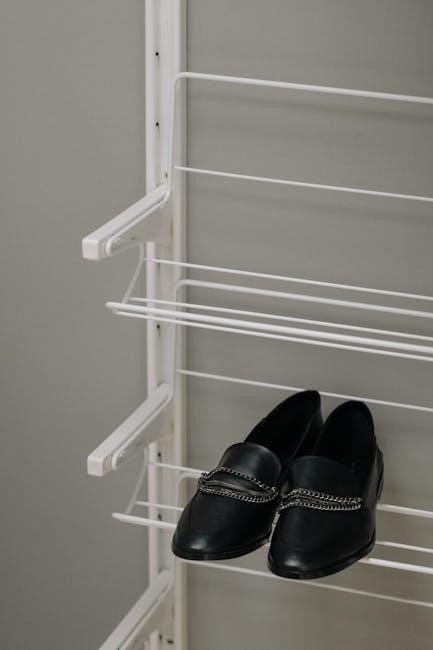
Simple Tiered Shoe Rack Plans
Tiered shoe rack plans represent an excellent starting point for beginner woodworkers, offering straightforward construction with minimal complexity․ These plans typically involve assembling horizontal shelves supported by vertical side pieces, creating stacked levels for shoe storage․
Many free PDF plans available online detail precise cutting lists, assembly diagrams, and material requirements, often utilizing readily available lumber like pine or plywood․ The simplicity of the design allows for quick completion and provides a functional solution for organizing footwear in entryways, closets, or bedrooms․
Variations within this category include adjustable shelf heights and the addition of a back panel for increased stability․ These plans frequently emphasize ease of construction, making them ideal for those with limited woodworking experience or time constraints․ Customization options, such as painting or staining, further enhance the aesthetic appeal․
Bench with Shoe Storage Plans
Bench with shoe storage plans combine seating functionality with practical shoe organization, making them ideal for entryways or mudrooms․ These plans typically involve constructing a sturdy bench frame with integrated shelving or cubbies underneath for shoe storage․
Numerous free PDF plans showcase various designs, ranging from simple, rustic benches to more elaborate, upholstered options․ Common features include lift-up bench seats revealing hidden storage, or open shelving accessible from the front or sides․ Material lists often include lumber, plywood, and hardware like hinges and drawer slides․
These plans cater to different skill levels, with some offering detailed step-by-step instructions and others requiring more advanced woodworking techniques․ Customization options abound, allowing builders to adjust dimensions, add cushions, or incorporate decorative elements to match their home’s aesthetic․
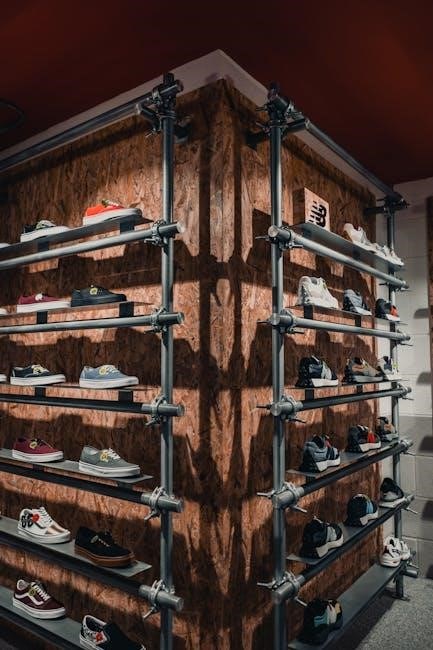
Vertical Shoe Rack Plans
Vertical shoe rack plans are excellent space-savers, particularly suited for smaller entryways or closets․ These plans focus on building upwards, utilizing wall space to maximize shoe storage capacity without occupying significant floor area․ Free PDF plans commonly feature designs ranging from simple tiered shelving units to more complex ladder-style racks․
Construction typically involves assembling vertical supports and horizontal shelves, often using readily available lumber or plywood․ Plans often detail methods for securely mounting the rack to the wall for stability․ Variations include open-back designs for ventilation and closed-back options for a more finished look․
Many plans offer customization options, allowing adjustments to height, width, and shelf spacing to accommodate different shoe collections and space constraints․ Some designs incorporate additional features like hooks for hanging accessories․
Hidden Shoe Cabinet Plans
Hidden shoe cabinet plans offer a more discreet storage solution, concealing shoes within a cabinet-style structure․ These plans often resemble traditional furniture pieces, blending seamlessly into hallways or entryways․ Free PDF plans typically showcase designs with doors or panels to hide the shoe collection from view, creating a tidier appearance․
Construction generally involves building a cabinet frame with internal shelving or compartments specifically designed for shoes․ Plans detail techniques for incorporating hinges, doors, and potentially decorative elements like molding or trim․
Variations range from simple, box-shaped cabinets to more elaborate designs with angled shelves or pull-out drawers․ Customization options include adjusting dimensions, adding paint or stain, and incorporating seating into the cabinet design for a dual-purpose piece․
Essential Tools and Materials
Successful builds require basic woodworking tools – saws, drills, and sanders – alongside wood like pine, oak, or plywood, plus fasteners and finishing supplies․
Wood Selection for Shoe Racks (Pine, Oak, Plywood)
Choosing the right wood is crucial for a durable and aesthetically pleasing shoe rack․ Pine is an economical and easily workable option, ideal for painted finishes and simpler designs, though it’s softer and prone to dents․
Oak, a hardwood, offers superior strength and a beautiful grain, making it suitable for stained or varnished racks intended for heavier use and a more classic look․ However, oak is more expensive and harder to cut․
Plywood provides a cost-effective and stable alternative, particularly for larger surfaces or when a consistent appearance is desired․ It’s less visually appealing than solid wood but can be veneered for a better finish․ Consider the project’s budget, desired aesthetic, and structural requirements when selecting your wood․
Required Tools: Cutting, Drilling, Sanding
Successful shoe rack construction demands specific tools․ For cutting wood accurately, a circular saw or hand saw is essential; a miter saw enhances precision for angled cuts․ A power drill with various bit sizes is needed for creating pilot holes and securing fasteners․
Sanding tools, including sandpaper of varying grits (coarse, medium, fine) and a sanding block or electric sander, are vital for achieving smooth surfaces and preparing wood for finishing․
Additional helpful tools include a measuring tape, square, clamps to hold pieces during assembly, safety glasses, and a dust mask․ Investing in quality tools will significantly improve the ease and quality of your DIY project․
Fasteners and Finishing Supplies
Securing your wooden shoe rack requires appropriate fasteners․ Wood screws are commonly used, available in various lengths and gauges to suit different wood thicknesses․ Wood glue provides added strength and stability to joints․ Consider using pocket hole screws for a clean, concealed finish․
Finishing supplies are crucial for protecting the wood and enhancing its appearance․ Options include wood stain to change the color, paint for a vibrant look, and varnish or polyurethane for a durable, protective coating․
Brushes, rollers, or spray applicators are needed for applying finishes․ Don’t forget sandpaper for between-coat sanding and rags for cleanup․ Safety precautions, like gloves and a respirator, are recommended when working with finishes․

Finding Free Wooden Shoe Rack Plans (PDF)
Numerous websites offer downloadable PDF plans for DIY wooden shoe racks, including options from Bunnings Warehouse and various woodworking enthusiast sites․
Explore these resources to discover a wide array of designs and building instructions․
Popular Websites Offering Free Plans
Several online platforms consistently provide a wealth of free wooden shoe rack plans in PDF format․ Bunnings Warehouse, a well-known home improvement retailer, features a step-by-step guide for constructing a timber shoe rack that also functions as a hallway stand – a practical and space-saving design․
Beyond retail sites, numerous woodworking and DIY enthusiast websites curate collections of plans․ These include sites dedicated to free woodworking projects, often showcasing designs ranging from simple tiered racks to more elaborate benches with integrated shoe storage․ Searching for “free DIY shoe rack plans PDF” will yield results from platforms like Instructables and various personal woodworking blogs․
Remember to carefully review the plan’s complexity and required skill level before starting your project․ Many sites also offer user reviews and photos of completed projects, providing valuable insights and inspiration․
Key Features to Look for in a Plan
When selecting a wooden shoe rack plan in PDF format, prioritize clarity and comprehensiveness․ A good plan will include detailed cutting lists, specifying wood dimensions and quantities needed for each component․ Look for plans with clear, labeled diagrams illustrating assembly steps – visual guidance is crucial for successful construction․
Pay attention to the skill level indicated; beginner plans should have simpler joinery techniques, while advanced plans may involve more complex methods․ Consider the plan’s customization options; can you easily adjust dimensions to fit your space or add features like hooks or baskets?
Finally, check if the plan includes finishing recommendations, such as appropriate paints, stains, or varnishes to protect and enhance the wood․ User reviews, if available, can offer valuable feedback on the plan’s accuracy and ease of use․
Step-by-Step Construction Guide (General)
Begin by precisely cutting wood pieces according to your chosen plan’s dimensions․ Then, assemble the frame securely, followed by installing shelves and applying desired finishing touches․
Cutting the Wood According to Plan
Accurate wood cutting is paramount for a successful shoe rack build․ Carefully review your chosen wooden shoe rack plan’s cutting list, noting the precise dimensions for each piece of wood required․ Utilize a measuring tape, pencil, and square to mark the cut lines clearly on the wood․

Employ appropriate cutting tools – a circular saw, hand saw, or miter saw – ensuring safety precautions are followed․ Cut slightly outside the marked line initially, then refine the cut for a precise fit․ Double-check all measurements before making final cuts to avoid costly errors․ Label each piece as you cut it, referencing the plan’s parts list for easy identification during assembly․ Smooth any rough edges with sandpaper for a professional finish․
Assembling the Shoe Rack Frame
With all wood pieces cut according to your plan, begin assembling the shoe rack’s frame․ Typically, this involves joining the side supports, top, and bottom pieces․ Utilize wood glue and screws or nails for a strong and durable connection․ Pre-drilling pilot holes prevents wood splitting, especially when working with hardwoods․
Ensure the frame is square by measuring diagonally – both measurements should be equal․ Clamps are invaluable for holding pieces securely while the glue dries․ If your plan includes a back panel, attach it now for added stability․ Regularly check for squareness throughout the assembly process․ Wipe away any excess glue immediately with a damp cloth for a clean finish․
Adding Shelves and Finishing Touches
Once the frame is securely assembled, it’s time to install the shelves․ Measure and mark the desired shelf positions, ensuring consistent spacing․ Attach the shelves using wood glue and screws, or shelf supports if the plan specifies․ For added strength, consider reinforcing the shelf corners with small brackets․
After the shelves are in place, focus on finishing touches․ Sand all surfaces smooth, paying attention to edges and corners․ Apply your chosen finish – paint, stain, or varnish – following the manufacturer’s instructions․ Multiple coats often provide better protection and appearance․ Allow each coat to dry completely before applying the next․

Customization Options
Personalize your shoe rack by adjusting dimensions, adding paint or stain, and incorporating features like hooks or baskets for enhanced functionality․
Adjusting Dimensions for Space
One of the greatest advantages of utilizing wooden shoe rack plans is the ability to tailor the project to your available space․ Many plans are designed with flexibility in mind, allowing for easy modification of height, width, and depth․
Before commencing construction, carefully measure the intended location for your shoe rack․ Consider ceiling height, available floor space, and any obstructions like doors or corners․
Adjusting the plan’s dimensions ensures a perfect fit, maximizing storage capacity without overwhelming the area․ For smaller spaces, a taller, narrower rack might be ideal, while larger areas can accommodate wider, multi-tiered designs․ Don’t hesitate to scale the plans proportionally to suit your needs, remembering to recalculate material quantities accordingly․
Adding Paint, Stain, or Varnish
Once your wooden shoe rack is assembled, applying a finish not only enhances its aesthetic appeal but also protects the wood from wear and tear․ The choice between paint, stain, or varnish depends on your desired look and the wood type used․

Paint offers a wide range of color options and provides a durable, opaque finish․ Stain penetrates the wood, highlighting its natural grain while adding color․ Varnish creates a protective, transparent coating, enhancing the wood’s beauty and providing resistance to scratches and moisture․
Proper surface preparation – sanding and cleaning – is crucial for optimal adhesion․ Apply multiple thin coats, allowing each to dry completely before the next, for a professional-looking result․
Incorporating Additional Features (Hooks, Baskets)
Elevate your DIY shoe rack beyond simple storage by integrating practical and stylish additional features․ Hooks are excellent for hanging keys, scarves, or dog leashes, maximizing hallway functionality․ Strategically placed baskets woven or metal can hold smaller items like socks, gloves, or cleaning supplies, keeping everything organized․
Consider the overall design aesthetic when selecting features․ Rustic racks benefit from woven baskets, while modern designs pair well with sleek metal options․ Ensure hooks are securely fastened to support weight․
Planning these additions during the construction phase simplifies installation․ Pre-drilling holes for hooks or designing shelf spaces to accommodate baskets streamlines the process․


Leave a Reply
You must be logged in to post a comment.