
sha cerlin bed frame instructions
Sha Cerlin Bed Frame Instructions: A Comprehensive Guide
Navigating the assembly of your Sha Cerlin bed frame is now easier than ever! This guide provides detailed steps‚ addressing potential issues and ensuring a sturdy‚ stylish sleep solution.
Understanding the Sha Cerlin Bed Frame

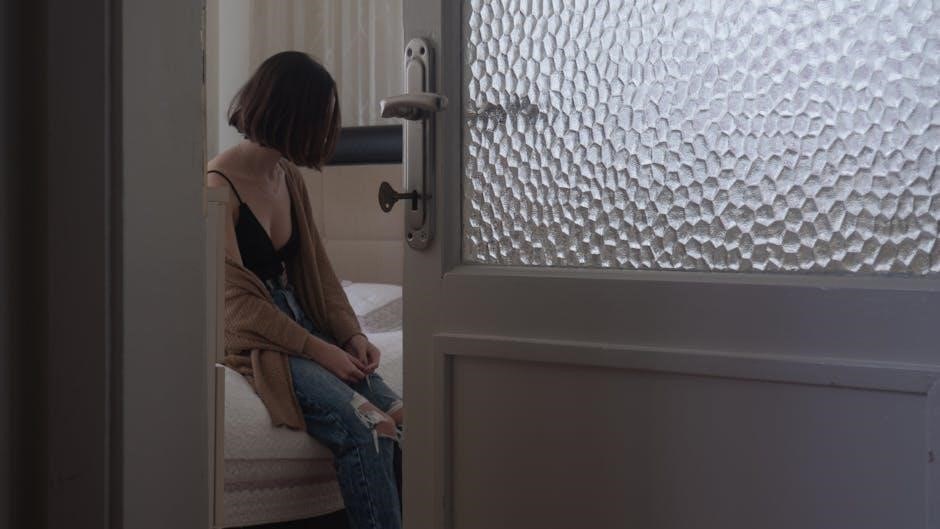
The Sha Cerlin bed frame‚ particularly models like the 14 Queen Size Metal Platform Bed‚ represents a blend of Victorian aesthetics and modern functionality. It’s designed as a complete platform‚ eliminating the need for a box spring‚ which simplifies setup and reduces overall cost. The frame’s construction typically features a robust metal base providing excellent support and durability.
Key components include the headboard and footboard‚ often showcasing intricate Victorian detailing‚ alongside side rails and supportive slats. Understanding these parts is crucial before beginning assembly. The platform design ensures even weight distribution‚ contributing to a stable and comfortable sleep experience. Many users appreciate the bed’s ability to complement various bedroom decors‚ offering a touch of elegance without being overly ornate. Prime Big Deal Days often feature discounts on this popular model‚ making it an accessible option for many.
Unboxing and Inventory
Upon receiving your Sha Cerlin bed frame‚ carefully inspect the packaging for any signs of damage during transit. Gently open the box and lay out all components on a protected surface – a drop cloth or cardboard is ideal to prevent scratches.
A thorough inventory is the next crucial step. Cross-reference the parts list included in the packaging with the actual components. You should find the headboard‚ footboard‚ side rails (typically two)‚ wooden slats‚ and a bag containing all necessary hardware – bolts‚ screws‚ washers‚ and potentially an Allen wrench. Note the quantity of each item.
If any parts are missing or damaged‚ do not proceed with assembly. Contact the retailer or Sha Cerlin’s customer support immediately to request replacements. Keeping the original packaging can be helpful for returns or exchanges. A complete inventory now saves frustration later!
Tools Required for Assembly
Assembling your Sha Cerlin bed frame is generally straightforward‚ but having the right tools will significantly streamline the process and ensure a secure build. While some hardware might be included‚ a few essential tools are highly recommended.
A Phillips head screwdriver is crucial for tightening most screws. An Allen wrench set (often included‚ but a dedicated set is useful) is needed for bolts. A rubber mallet can gently assist in joining pieces without causing damage. For added convenience‚ a power drill with appropriate bits can speed up the process‚ but use it on a low torque setting to avoid over-tightening.
A level is helpful to ensure the bed frame is perfectly horizontal‚ preventing wobbling. Finally‚ a soft cloth or blanket placed under the components will protect the finish from scratches during assembly; Having these tools readily available will make the build much smoother!

Step-by-Step Assembly Instructions ー Part 1: Side Rails
Begin by identifying the left and right side rails of your Sha Cerlin bed frame. Typically‚ these are mirror images of each other. Locate the corner brackets and attach them to the inside of each side rail using the provided bolts and washers. Ensure the brackets are flush with the end of the rail.

Next‚ connect the side rails to the headboard and footboard using the same bolt and washer combination. Align the holes carefully and hand-tighten initially. Do not fully tighten at this stage‚ as adjustments may be needed later;
Once all four corners are loosely connected‚ double-check the alignment to form a rectangular frame. Now‚ systematically tighten all bolts securely‚ working diagonally to ensure even pressure distribution. This creates a stable foundation for the next steps.
Attaching the Headboard
Carefully position the headboard upright‚ ensuring the decorative Victorian design faces outwards. Locate the pre-drilled holes on both the headboard and the assembled side rail/footboard frame. Align these holes precisely – this is crucial for a secure and aesthetically pleasing attachment.
Using the longer bolts provided specifically for the headboard‚ insert them through the frame and into the headboard. Hand-tighten these bolts initially to allow for minor adjustments. A second person can be helpful to hold the headboard steady during this process.
Once aligned‚ use the appropriate wrench or Allen key to fully tighten the headboard bolts. Ensure they are snug but avoid over-tightening‚ which could damage the headboard or frame. Double-check the stability of the headboard before proceeding.
Securing the Footboard
With the headboard firmly attached‚ turn your attention to securing the footboard. Similar to the headboard attachment‚ locate the pre-drilled holes on the footboard and the existing frame structure. Ensure proper alignment before proceeding – a misaligned footboard can compromise the bed’s stability.
Utilize the remaining longer bolts‚ mirroring the process used for the headboard. Insert them through the frame and into the footboard‚ initially hand-tightening for adjustment flexibility. The Victorian design of the footboard should be facing outwards‚ complementing the headboard.
Once aligned and stable‚ fully tighten the footboard bolts using the provided wrench or Allen key. Again‚ avoid over-tightening. A secure footboard is essential for preventing mattress slippage and ensuring overall bed frame integrity. Verify stability before moving on.
Step-by-Step Assembly Instructions ー Part 2: Slat Installation
Now that the frame is structurally sound‚ it’s time to install the wooden slats. These provide essential support for your mattress. Begin by laying out the slats across the side rails‚ ensuring they are evenly spaced. Most Sha Cerlin frames feature pre-marked locations or slots to guide placement.
Depending on the model‚ slats may simply rest on the frame or require securing with small screws or plastic caps. If screws are provided‚ gently fasten each slat to the side rails‚ avoiding over-tightening which could split the wood. Ensure each slat is flush with the frame.
Proper slat installation is crucial for mattress longevity and comfort. Double-check that all slats are securely in place before proceeding. A well-supported mattress will distribute weight evenly‚ preventing sagging and enhancing sleep quality.

Slat Spacing and Support
Optimal slat spacing is key to a comfortable and supportive sleep experience. The Sha Cerlin bed frame is designed with specific slat gaps to accommodate most standard mattresses‚ typically ranging between 2-3 inches. This ensures adequate airflow and prevents mattress compression.
For heavier mattresses or individuals‚ consider adding extra slats for increased support. This is easily achieved by purchasing additional slats from the manufacturer or a hardware store. Ensure they are the correct length and width to fit seamlessly within the frame.
Central support is vital‚ especially for larger bed sizes (Queen‚ King). Many Sha Cerlin frames include a center support beam with legs. Confirm this is properly installed and leveled to prevent sagging and distribute weight evenly across the entire bed surface;
Addressing Common Assembly Issues
Even with clear instructions‚ occasional hiccups during assembly are normal. One frequent issue is difficulty aligning parts – ensure all components are oriented correctly before applying force. Loosely assemble sections first‚ then tighten once everything is aligned.

Missing hardware can be frustrating. Double-check all packaging materials and the inventory list. If a piece is genuinely missing‚ contact the retailer or Sha Cerlin’s customer support immediately. Do not substitute parts‚ as this could compromise the frame’s integrity.
Stripped screws are another common problem. Avoid over-tightening. If a screw begins to strip‚ stop immediately and try a slightly larger size or use a screw extractor. Patience and a gentle touch are crucial for a smooth assembly process.
Difficulty Aligning Parts
Misalignment during Sha Cerlin bed frame assembly is a frequently reported issue. Often‚ it stems from attempting to force connections before ensuring all components are correctly oriented. Begin by loosely connecting the side rails to the headboard and footboard; avoid fully tightening any bolts at this stage.
Carefully examine the pre-drilled holes – they should line up seamlessly. If there’s resistance‚ don’t apply excessive pressure. Instead‚ slightly loosen the connections you’ve already made and re-adjust the positioning. A rubber mallet can gently encourage alignment without causing damage.

Double-check that you’re using the correct hardware for each connection point‚ as using the wrong size bolt can create misalignment. Refer to the parts list frequently throughout the process.
Missing Hardware
Discovering missing hardware within your Sha Cerlin bed frame package can be frustrating‚ but solutions are available. First‚ meticulously re-check the packaging materials – smaller parts are often concealed within cardboard flaps or taped to larger components.

Compare the contents against the detailed parts list included in the instruction manual. This will quickly identify exactly which items are absent. If a shortage is confirmed‚ do not attempt to substitute with non-original hardware‚ as this could compromise the bed’s structural integrity.
Contact the retailer or Sha Cerlin’s customer support immediately. Provide your order number and a clear list of the missing parts. Most suppliers are happy to ship replacements free of charge. Keep records of all communication for future reference.
Weight Capacity and Support
Understanding the weight capacity of your Sha Cerlin bed frame is crucial for safety and longevity. Generally‚ queen-size metal platform frames‚ like the SHA CERLIN 14‚ are designed to support a substantial amount of weight‚ typically around 800-1000 lbs. However‚ always verify the specific capacity listed in your product manual‚ as variations exist.
This weight limit encompasses not only the mattress and bedding but also the combined weight of the individuals sleeping on the bed. Exceeding the recommended weight capacity can lead to structural failure‚ potentially causing damage to the frame or even injury.
Ensure even weight distribution by avoiding concentrated pressure on any single point of the frame. Regularly inspect the support slats and tighten any loose bolts to maintain optimal stability and prevent undue stress on the metal structure.
Maintenance and Care
Regular maintenance will significantly extend the life of your Sha Cerlin bed frame and ensure continued stability. A simple routine can prevent issues and maintain its aesthetic appeal. Periodically – at least every six months – inspect all bolts and screws‚ tightening them as needed. This is particularly important after initial assembly and after moving the bed.
Dust the metal frame regularly with a soft‚ dry cloth to prevent buildup. Avoid abrasive cleaners‚ as these can damage the finish. For more stubborn dirt‚ a mild soap solution can be used‚ but ensure the frame is thoroughly dried afterward to prevent rust.
Check the support slats for any signs of wear or damage‚ replacing them if necessary. Proper care will keep your bed frame looking and functioning optimally for years to come.
Cleaning the Metal Frame
Maintaining a clean metal frame is crucial for longevity and preventing rust. Begin by removing all bedding and vacuuming around and under the bed to eliminate dust and debris. For routine cleaning‚ a soft‚ dry cloth is usually sufficient to wipe down the metal surfaces.
If more thorough cleaning is required‚ prepare a solution of mild soap and warm water. Dampen a cloth with the solution (avoid soaking it!) and gently wipe the frame. Immediately dry the frame with a clean‚ dry cloth to prevent water spots and corrosion.
Avoid harsh chemicals‚ abrasive cleaners‚ or scouring pads‚ as these can scratch or damage the finish. For hard-to-reach areas‚ a vacuum attachment with a soft brush can be helpful. Regular cleaning will keep your Sha Cerlin bed frame looking its best.
Tightening Bolts and Screws
Regularly tightening bolts and screws is essential for maintaining the stability and safety of your Sha Cerlin bed frame. Over time‚ vibrations and use can cause these fasteners to loosen‚ potentially leading to squeaks or structural weakness.
Inspect all bolts and screws at least every three months‚ or more frequently if you notice any wobbling or unusual noises. Use the appropriate wrench or screwdriver (typically included with the frame) to gently tighten each fastener. Avoid over-tightening‚ as this can strip the threads or damage the frame.
Pay particular attention to the bolts connecting the side rails‚ headboard‚ and footboard. A systematic approach – checking each connection point – ensures nothing is missed. Consistent tightening will prolong the life of your bed frame and provide a secure sleep surface.
Troubleshooting Squeaking Noises
Squeaking noises from your Sha Cerlin bed frame can be disruptive‚ but are often easily resolved. The most common cause is friction between metal components. Begin by systematically identifying the source of the squeak – does it occur with specific movements‚ or constantly?
Carefully inspect all bolted connections‚ ensuring they are adequately tightened (refer to the ‘Tightening Bolts and Screws’ section). If tightening doesn’t resolve the issue‚ the squeak may originate from the slats. Check that the slats are properly seated and haven’t shifted.
Lubrication is often the key. Apply a small amount of silicone-based lubricant (avoid oil-based products) to the points of contact between metal parts‚ or where the slats rest on the frame. Test after each application to pinpoint the exact source and avoid over-lubrication.
Identifying the Source of the Squeak
Pinpointing the origin of a squeak is crucial for effective resolution. Start by having someone gently rock the bed frame while you listen intently. Does the sound emanate from the headboard‚ footboard‚ side rails‚ or the slat area?
Systematically apply pressure to different sections – push down on the headboard‚ footboard‚ and along the side rails. Note if pressure in a specific area exacerbates the noise. Pay close attention to where metal components connect; these are prime suspects.
Observe the squeak during different movements: getting in and out of bed‚ turning over‚ or simply shifting your weight. This can help isolate whether the noise is related to specific joints or the slat support system. A methodical approach will save time and frustration!
Lubrication Techniques
Once the squeak’s source is identified‚ lubrication is often the solution. Silicone-based lubricants are ideal as they won’t attract dust like oil-based products. Apply sparingly using a spray nozzle for precision.
Focus on connection points: where the headboard and footboard attach to the side rails‚ and where slats rest on the frame; Lift the slats slightly to apply lubricant underneath. Avoid getting lubricant on the mattress or bedding.
For stubborn squeaks‚ a small amount of beeswax or dry graphite powder can be effective. Work it into the joint and wipe away any excess. Remember to test the lubricant in an inconspicuous area first to ensure it doesn’t damage the finish. Repeat application if needed‚ but avoid over-lubricating.
Customer Reviews and Feedback
Customer experiences with the Sha Cerlin bed frame are overwhelmingly positive‚ particularly regarding its aesthetic appeal and ease of assembly. Many reviewers highlight the Victorian headboard and footboard as adding a touch of elegance to their bedrooms.
Common feedback includes praise for the sturdy metal construction and the platform design eliminating the need for a box spring. Some users mention the bed frame arriving well-packaged and with all necessary hardware. However‚ a few customers reported minor alignment issues during assembly‚ easily resolved with patience.
Prime Big Deal Days saw a surge in purchases‚ with many citing the discounted price as a key factor. Overall‚ the Sha Cerlin bed frame consistently receives high ratings for its value‚ style‚ and durability.
Warranty Information and Support
Sha Cerlin offers a standard one-year warranty against manufacturing defects on their metal platform bed frames‚ including the Queen Size model with the Victorian headboard and footboard. This warranty covers issues like faulty welding‚ broken slats‚ or defective hardware upon arrival.
For warranty claims or customer support‚ it’s recommended to initially contact the seller through the platform where the bed frame was purchased (e.g.‚ Amazon). They will likely request photos or videos documenting the issue. Direct contact with Sha Cerlin’s customer service is also possible via their website.
Response times can vary‚ but generally‚ customers report satisfactory resolution of issues. Keep your order number and purchase date readily available when contacting support. Detailed assembly instructions and FAQs are available online to assist with common problems.
Where to Find Replacement Parts
Locating replacement parts for your Sha Cerlin bed frame is typically straightforward. The primary source is directly through the retailer where you made your purchase‚ such as Amazon. They often stock common replacement components like slats‚ bolts‚ and washers.
If the original retailer doesn’t have the specific part‚ contacting Sha Cerlin’s customer support is the next step. They can often ship replacement hardware directly to you‚ though a small shipping fee may apply. Be prepared to provide your bed frame model number and a detailed description of the needed part.
Online marketplaces may also offer compatible replacement parts‚ but verifying compatibility is crucial. Carefully compare dimensions and specifications before ordering. Keeping a small set of extra bolts and screws from the initial assembly can also be a helpful preventative measure.


Leave a Reply
You must be logged in to post a comment.