
beech lane rv fridge fan installation instructions
Beech Lane RV Fridge Fan Installation: A Comprehensive Guide
Beech Lane fans address poor RV fridge air circulation, preventing food spoilage and maximizing cooling, especially crucial for 12V models like Furrion.
Understanding the Need for a Fridge Fan
RV refrigerators, particularly absorption models, often struggle with consistent temperature distribution. Cold air descends, pooling at the bottom while upper shelves remain warmer, leading to potential food spoilage. Unlike newer 12V refrigerators like Furrion, which demonstrate improved cooling performance, older or less efficient units greatly benefit from enhanced airflow.
The Beech Lane RV Fridge Fan directly addresses this issue. Without forced circulation, the natural convection within the fridge isn’t sufficient to maintain uniform temperatures. This is especially true when the fridge is fully loaded, obstructing natural airflow pathways. Solid glass shelves, common in many RV fridges, further limit air movement compared to rack-style shelving.
Installing a fan ensures cold air reaches all areas, preserving food quality and extending its lifespan. For those who frequently boondock or camp off-grid, optimizing fridge efficiency is paramount, and a fan can contribute to reduced power consumption by minimizing temperature fluctuations. The Beech Lane fan is an essential accessory for any RVer seeking reliable cooling.
Benefits of the Beech Lane RV Fridge Fan
The Beech Lane RV Fridge Fan offers significant improvements to refrigerator performance within your recreational vehicle. A primary benefit is enhanced air circulation, directly combating the common issue of temperature stratification within RV fridges. This ensures consistent cooling throughout, preventing food spoilage and maximizing usable storage space.
Recent engineering upgrades, specifically the “Spiderweb Top” design, prioritize maximizing airflow through the fan unit. This proprietary feature ensures even greater circulation efficiency. The inclusion of an easy-to-use on/off switch provides convenient control, allowing users to conserve battery life when maximum cooling isn’t required.
Beyond improved food preservation, the Beech Lane fan can potentially extend the lifespan of your refrigerator by reducing strain on the cooling system. It’s a practical and relatively simple upgrade that addresses a notorious weakness in many RV refrigerator designs, offering peace of mind and reliable performance.
Fan Types: Single vs. Dual Fan Systems

Beech Lane offers both single and dual-fan systems for RV refrigerator cooling, catering to different needs and fridge sizes. Single-fan systems are suitable for smaller refrigerators or those experiencing moderate temperature inconsistencies. They provide a noticeable improvement in air circulation, offering a cost-effective solution for basic cooling enhancement.
However, for larger refrigerators, particularly 10 cubic foot models like the Furrion, or for use in hotter climates, a dual-fan system is highly recommended. Dual fans deliver significantly increased airflow, ensuring more consistent and effective cooling throughout the entire refrigerator compartment.
The choice depends on your specific RV fridge dimensions and typical operating conditions. While a single fan can improve performance, a dual-fan setup maximizes the benefits, providing optimal temperature regulation and food preservation. Consider your cooling needs carefully when selecting the appropriate system.
Tools and Materials Required
Installation demands basic tools: screwdriver, wire strippers, and a multimeter. The Beech Lane kit includes fans, mounting hardware, and a switch for convenient operation.
Essential Tools for Installation
Successfully installing a Beech Lane RV Fridge Fan requires a few essential tools to ensure a secure and functional setup. A Phillips head screwdriver is paramount for attaching the fan units and mounting brackets to the refrigerator interior. Wire strippers are crucial for preparing the 12V power wires for connection, ensuring clean and reliable electrical contacts.
A multimeter is highly recommended for verifying the 12V power source and confirming proper wiring polarity before connecting the fan. This prevents potential damage to the fan or the RV’s electrical system. Additionally, a small drill with appropriate drill bits might be necessary if the mounting screws don’t easily penetrate the refrigerator’s interior surfaces.
Consider having electrical tape or heat-shrink tubing on hand for insulating wire connections, providing an extra layer of safety. Finally, zip ties or wire clamps are useful for neatly securing the wiring harness, preventing it from interfering with refrigerator operation or becoming a safety hazard. Having these tools readily available will streamline the installation process.
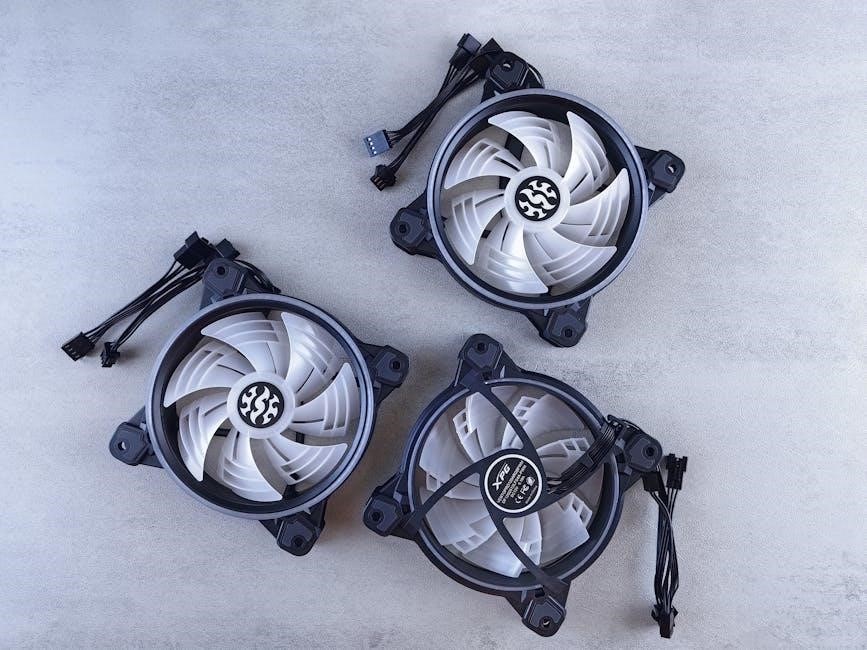
Beech Lane Fan Kit Contents
The Beech Lane RV Fridge Fan Kit typically includes everything needed for a straightforward installation. You’ll find one or two 12V DC fans, depending on whether you purchased a single or dual-fan system. Each fan unit comes with pre-attached mounting brackets designed to securely attach to the refrigerator’s interior walls.
A crucial component is the on/off switch, allowing convenient control of the fan’s operation and conserving battery power when cooling isn’t required. The kit also provides a length of 12V wiring, sufficient to reach the refrigerator’s power source. Importantly, the newer kits feature a “Spiderweb Top” design, engineered for enhanced airflow circulation within the fridge.
While wire connectors are sometimes included, it’s often best to source your own high-quality connectors for a more reliable connection. Detailed installation instructions are also provided, guiding you through each step of the process. Verify all components are present before beginning the installation.
Additional Supplies (Wire Connectors, etc.)
While the Beech Lane RV Fridge Fan Kit provides the core components, several additional supplies will ensure a clean and secure installation. High-quality 12V wire connectors are essential; butt connectors with heat shrink tubing are recommended for a robust, weatherproof connection. Consider purchasing a variety pack to accommodate different wire gauges.
Electrical tape is also crucial for insulating connections and preventing shorts. A small screwdriver, appropriate for the fan’s mounting screws, will simplify bracket attachment. Zip ties are incredibly useful for neatly securing the wiring harness, preventing it from interfering with fridge operation or causing rattling during travel;
A wire stripper/crimper tool will make preparing and connecting the wires significantly easier and more professional. Finally, a multimeter can be helpful for verifying the 12V power source before making any connections, ensuring proper voltage and polarity.

Installation Process: Step-by-Step
Beech Lane fan installation involves preparing the fridge, mounting the fan unit(s), wiring to the 12V supply, and securing all wiring neatly.
Step 1: Preparing the Refrigerator
Before beginning the Beech Lane RV Fridge Fan installation, thorough preparation is essential for a smooth and effective process. Begin by completely emptying the refrigerator, removing all food items, shelves, and drawers. This provides clear access to the interior surfaces where the fan unit(s) will be mounted.
Carefully inspect the refrigerator’s interior, noting the existing ventilation openings and identifying suitable locations for fan placement. The “spiderweb top” design upgrade emphasizes maximizing airflow, so consider this when choosing mounting points. Ensure these locations are free from obstructions and offer a secure surface for adhesion or mounting screws.
Clean the chosen mounting surfaces with a suitable cleaner to remove any dust, dirt, or residue. This ensures optimal adhesion for the fan unit’s mounting hardware. Finally, double-check that the refrigerator is disconnected from the power source to prevent any electrical hazards during the installation process. Safety first!
Step 2: Mounting the Fan Unit(s)
With the refrigerator prepared, proceed to mount the Beech Lane fan unit(s). Depending on the kit and refrigerator model, mounting can involve adhesive pads, screws, or a combination of both. If using adhesive pads, ensure the mounting surfaces are clean and dry for a strong bond. Peel and stick the pads firmly, applying even pressure.
For screw mounting, carefully align the fan unit with the pre-drilled holes (if available) or mark new locations. Use appropriate screws for the refrigerator’s material, avoiding excessive force to prevent damage. If installing a dual-fan system, position the fans strategically to maximize airflow throughout the refrigerator compartment.
Pay attention to the fan’s orientation, ensuring the airflow direction promotes circulation. The upgraded “spiderweb top” should be unobstructed. Securely fasten each fan unit, verifying stability before proceeding to the wiring stage. A properly mounted fan is crucial for optimal performance.
Step 3: Wiring the Fan to the 12V Power Supply
Now, connect the Beech Lane fan to your RV’s 12V power supply. Locate a suitable 12V source, ideally one that is switched, allowing you to turn the fan on and off conveniently. Carefully strip the ends of the fan’s wires and the 12V supply wires, exposing enough conductor for a secure connection.
Utilize appropriate wire connectors (butt connectors, spade connectors, or terminal blocks) to join the wires, ensuring a solid and insulated connection. Red wire typically indicates positive (+), and black indicates negative (-). Double-check the polarity before finalizing the connection.
The kit often includes an on/off switch for easy control. Integrate this switch into the wiring, interrupting the positive wire. Once connected, briefly test the fan to confirm proper operation before securing the wiring. Proper wiring is essential for safe and reliable performance.
Step 4: Securing the Wiring

With the fan successfully wired to the 12V power supply, the next crucial step is securing all wiring to prevent damage and ensure a neat installation. Use zip ties or cable clamps to bundle the wires together, keeping them organized and away from moving parts or sharp edges inside the refrigerator.
Route the wiring along existing RV wiring paths whenever possible, avoiding areas where the wires might be pinched or exposed to excessive heat. Ensure the wiring doesn’t interfere with the refrigerator’s operation or access to internal components.
Carefully conceal the wiring behind panels or within designated channels to maintain a clean appearance. Regularly inspect the secured wiring for any signs of wear or looseness, addressing any issues promptly to maintain a safe and reliable system. A secure installation minimizes risks and maximizes longevity.

Power Supply Considerations
Beech Lane fans require a stable 12V power source, often found near the refrigerator, necessitating appropriate fuse protection and correctly gauged wiring.
Identifying the 12V Power Source
Locating a suitable 12V power source is the first step in powering your Beech Lane fridge fan. Many RV refrigerators already have a nearby 12V power supply utilized for interior lights or control boards – this is often the most convenient option. Carefully inspect the back of your refrigerator or within the surrounding cabinetry for existing wiring.
If a dedicated 12V source isn’t readily available, you may need to tap into an existing circuit. However, always prioritize safety and avoid overloading circuits. A multimeter is invaluable for verifying voltage and confirming a consistent 12V supply. Ensure the chosen wire can handle the fan’s amperage draw (typically quite low, but check the fan’s specifications). Remember to document the source location for future reference or troubleshooting. Avoid using sources that are only active when the ignition is on, as this will prevent fan operation while traveling.
Fuse Protection and Wiring Gauge
Crucially, incorporate a fuse into the wiring circuit for your Beech Lane fan to protect against short circuits and potential damage to your RV’s electrical system. A fuse rated slightly higher than the fan’s maximum amperage draw is recommended – typically a 3A or 5A fuse will suffice, but verify the fan’s specifications. Install the fuse holder as close as possible to the 12V power source.
Regarding wiring gauge, 18 AWG wire is generally adequate for low-current applications like fridge fans, especially over short distances. However, if the run is longer than several feet, consider using 16 AWG wire to minimize voltage drop. Always use marine-grade or automotive-grade wire, designed to withstand the vibrations and temperature fluctuations common in RV environments. Proper wire gauge ensures efficient and safe operation of the fan.
Switch Installation (On/Off Control)
For convenient operation and to conserve battery power, installing an on/off switch is highly recommended. Choose a switch rated for at least 12V DC and capable of handling the fan’s amperage. Inline switches are easy to integrate into the wiring, simply cutting the positive wire and connecting each end to the switch terminals.
Mount the switch in an accessible location within the RV, such as near the refrigerator or on a control panel. Ensure the switch is securely fastened and clearly labeled. Some Beech Lane fan kits include a switch, simplifying this step. Remember to connect the positive wire from the 12V source to one terminal, the positive wire leading to the fan to the other, and ensure all connections are tight and insulated to prevent shorts.

Optimizing Fan Performance

Maximize airflow by strategically arranging fridge contents and utilizing the “Spiderweb Top” design, ensuring cold air circulates efficiently throughout the refrigerator.
Airflow and Shelf Configuration
Achieving optimal cooling with your Beech Lane RV fridge fan isn’t solely about the fan itself; it’s also about how you arrange items inside the refrigerator. Unlike older absorption fridges with rack-style shelving, many modern 12V refrigerators, like the Furrion, utilize solid glass shelves.
This design, while offering more usable space, can impede natural airflow. Therefore, avoid blocking vents or obstructing the path of circulated air. Strategically position food items to allow for maximum circulation. Don’t overcrowd the shelves; leave space between items.
Consider placing items that require the coldest temperatures towards the bottom, where cold air naturally settles, but ensure the fan’s airflow reaches them. Regularly check and adjust shelf contents to maintain consistent cooling throughout the refrigerator, maximizing the benefits of the Beech Lane fan system.
The “Spiderweb Top” Design and Air Circulation
Beech Lane has directly addressed a common limitation in RV refrigerator cooling with their innovative “Spiderweb Top” design. Recognizing that restricted airflow hinders performance, they’ve re-engineered the top opening of the fan unit to maximize air circulation. This proprietary upgrade ensures the most possible air is drawn through the fan, actively combating the stratification of cold and warm air.
The enhanced opening works in conjunction with the fan(s) to create a more consistent temperature throughout the refrigerator. This is particularly important in RVs where temperature fluctuations are common. The design aims to distribute cool air evenly, preventing spoilage and maintaining optimal food preservation.
This feature, combined with proper shelf configuration, significantly boosts the effectiveness of the Beech Lane fan, delivering superior cooling performance compared to standard RV refrigerators.
Fan Speed Control (If Applicable)
While some Beech Lane RV Fridge Fan kits may not include variable speed control, understanding potential options is beneficial. Many models feature a simple on/off switch for ease of use and battery conservation. This allows users to activate the fan only when needed, extending battery life during off-grid camping or boondocking situations.
If a speed control is present, it typically offers multiple settings to fine-tune airflow based on ambient temperature and refrigerator load. Lower speeds are suitable for moderate conditions, reducing noise and power consumption. Higher speeds provide maximum cooling during hot weather or when the refrigerator is heavily stocked.
Consult your specific kit’s documentation to determine if speed control is included and how to operate it effectively. Proper speed selection optimizes performance and energy efficiency.

Troubleshooting Common Issues
Beech Lane fan problems like no operation, noise, or reduced cooling often stem from wiring, power supply, or airflow obstructions; check these areas first.
Fan Not Working
If your Beech Lane RV fridge fan isn’t operating, begin with a systematic check of the power supply. Verify the 12V power source is active using a multimeter; ensure it’s delivering consistent voltage. Next, meticulously inspect the wiring connections – both at the fan unit itself and where it connects to the RV’s 12V system.
Loose wire connectors are a frequent culprit, so firmly reseat them. Also, confirm the inline fuse (if present) hasn’t blown. A blown fuse indicates a potential short circuit that needs addressing before replacing the fuse. If the switch is installed, test its functionality to confirm it’s turning the power on.
Double-check the polarity of the wiring; reversed polarity shouldn’t damage the fan, but it will prevent operation. Finally, if the fan still doesn’t run, consider a direct connection to the 12V source to bypass the switch and wiring, helping isolate the problem.
Excessive Noise
If your installed Beech Lane RV fridge fan is producing excessive noise, the first step is to identify the source. Ensure the fan unit is securely mounted; loose screws or vibrations against the refrigerator cabinet can amplify sound. Check for any obstructions – wires, foam, or debris – that might be contacting the fan blades.
Sometimes, the mounting surface itself can contribute to noise. Applying a small piece of foam padding between the fan housing and the refrigerator can dampen vibrations. Verify the fan blades are clean and free of any buildup. A slight imbalance in the blades can cause noticeable noise.

If the noise persists, and seems to be originating from the fan motor itself, it could indicate a failing bearing. While less common, this may require fan replacement. Ensure the fan speed is appropriately set, if a speed controller is installed.
Reduced Cooling Performance
If, after installing your Beech Lane RV fridge fan, you observe reduced cooling performance, several factors could be at play. First, confirm the fan is operating correctly and circulating air effectively. Ensure the “spiderweb top” design isn’t obstructed, allowing for maximum airflow throughout the refrigerator.
Check the refrigerator’s internal temperature settings and ensure they are appropriately adjusted for the ambient temperature. Overcrowding the refrigerator can also restrict airflow, hindering cooling efficiency. Proper shelf configuration is vital; avoid blocking vents with food items.
Verify the 12V power supply is stable and delivering sufficient voltage to the fan. A weak power source can reduce fan speed and, consequently, cooling performance. Consider the refrigerator’s overall condition; a poorly maintained fridge may struggle to cool even with a fan.


Leave a Reply
You must be logged in to post a comment.